This post may contain affiliate links. If you use these links to buy something we may earn a small commission. Thanks.
You want to fix a leaky faucet, but you don’t know where to start?
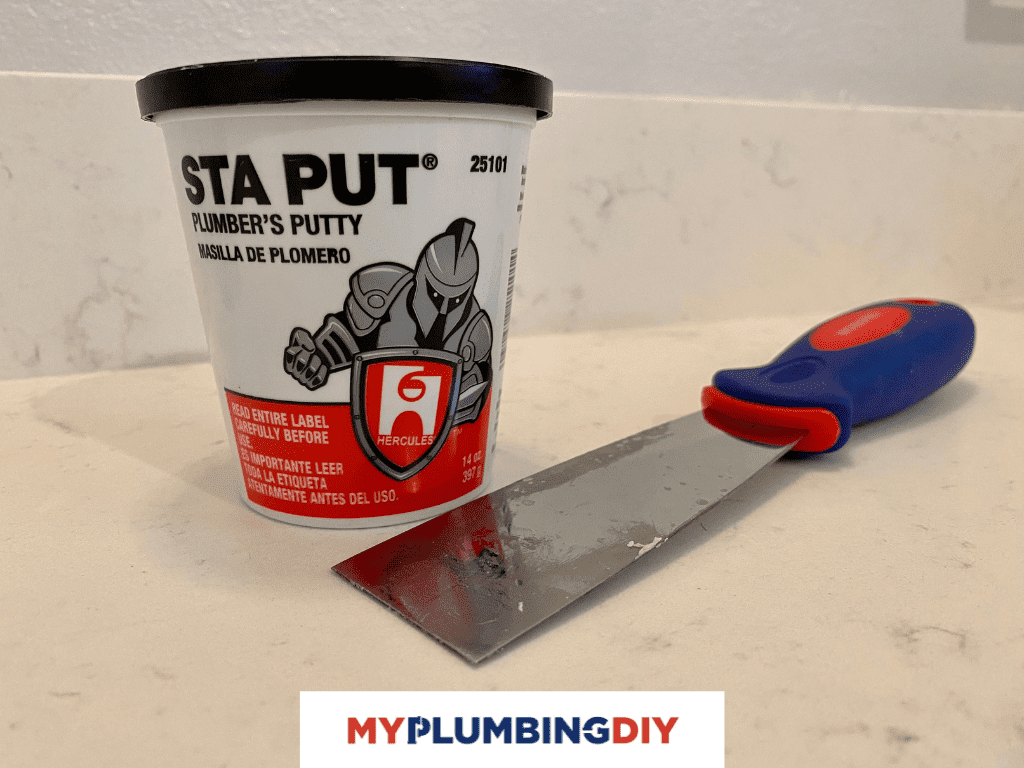
Plumber’s putty is an easy and affordable solution for fixing leaks in your home. It’s a sealant that is used to make waterproof seals around faucets, drains, and other plumbing components.
If the water is dripping from under the sink or through the faucet handles, plumber’s putty can help it stop leaking.
It works great on all kinds of fixtures and pipes, as well as sinks and tubs. However, it can sometimes be hard to use because the directions are often confusing and hard to follow.
This guide will teach you how to use plumber’s putty in 7 simple steps so that you can fix any plumbing issue on your own without breaking the bank or wasting time trying to figure out what went wrong.
Also, if it’s your first time purchasing plumber’s putty or you want to find a better product, check out our handpicked list of best plumber’s putty.
Before we get to the 7 steps, let us quickly understand how it works.
How Does Plumber’s Putty Work?
Plumber’s putty is a great sealant that keeps its shape even under pressure. It can be molded into any shape or size and used on all sorts of pipes, joints, and fixtures.
Once the putty is applied, it sticks to the surface and absorbs water to expand like a sponge. This expansion creates a watertight seal that stops and prevents leaks in your pipes, sinks, drains, and toilets.
Unlike other sealants, plumber’s putty remains soft with time and can be readily molded after the first application.
How to Use Plumber’s Putty?
It might seem confusing at first, but it’s actually quite simple. Just follow these steps to get the job done right in just a few minutes.
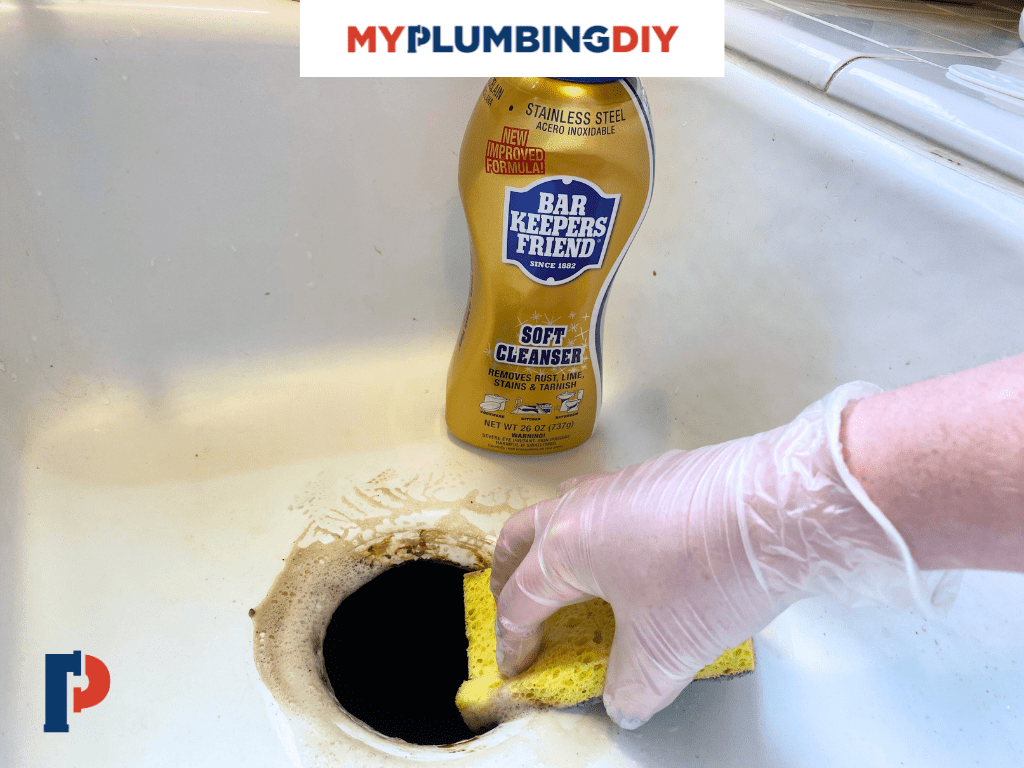
1. Clean the Surface
Before you start using, clean the surface where you want to apply it. Use a clean, damp cloth to wipe the surface and remove dirt and grime.
You should also get remove any old putty, tape, or adhesives. If not cleaned beforehand, these tiny molecules of dirt or previously used putty will result in irregular and potholed putty that may cause water to leak.
2. Heat your Hands
If the putty is too stiff to work with, you’ll have a difficult time applying it. Heating your hands will make the putty soft and easy to stretch.
Warm your hands by running them under hot water and drying them or rub them together. Then roll the putty between your palms for several minutes to soften it.
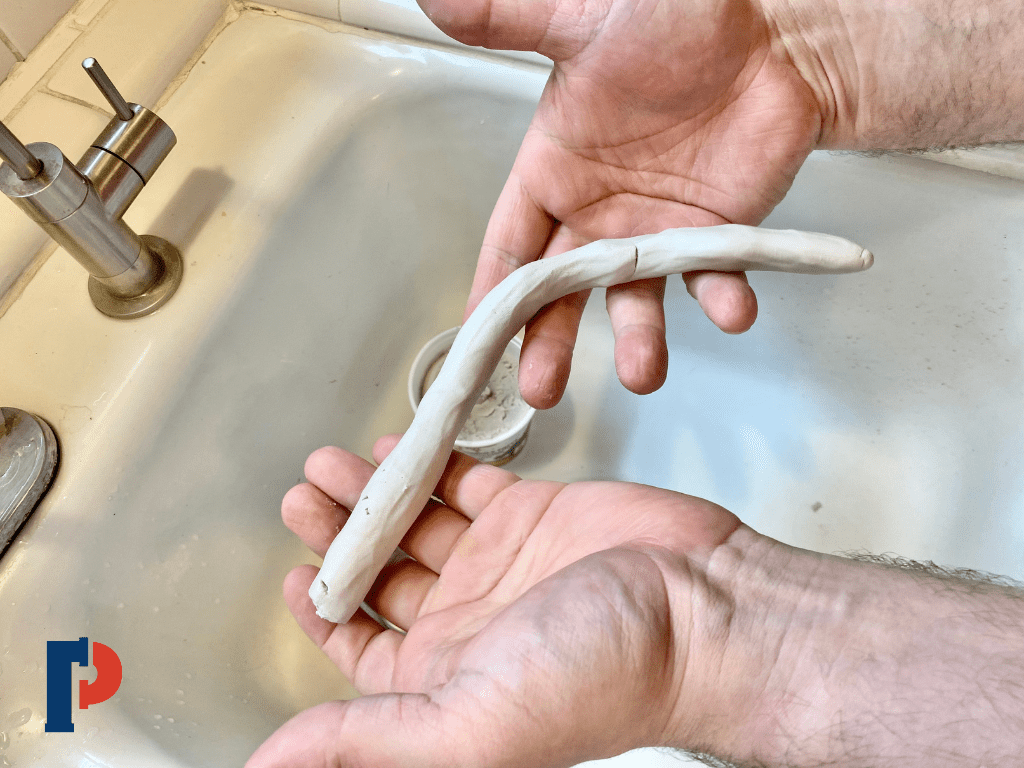
3. Make a Putty Rope
Next, roll the plumber’s putty between your palms to form a long, thin rope (or snake) shape. It should be smooth and soft in texture.
The putty rope must be equal to the length and thickness of your pipe or tube. Don’t be afraid to use more putty than you think you’ll need. You can always remove the extra if needed.
If you want to use more than one strip, each strip should be separated enough so that they do not mix with one another during application.
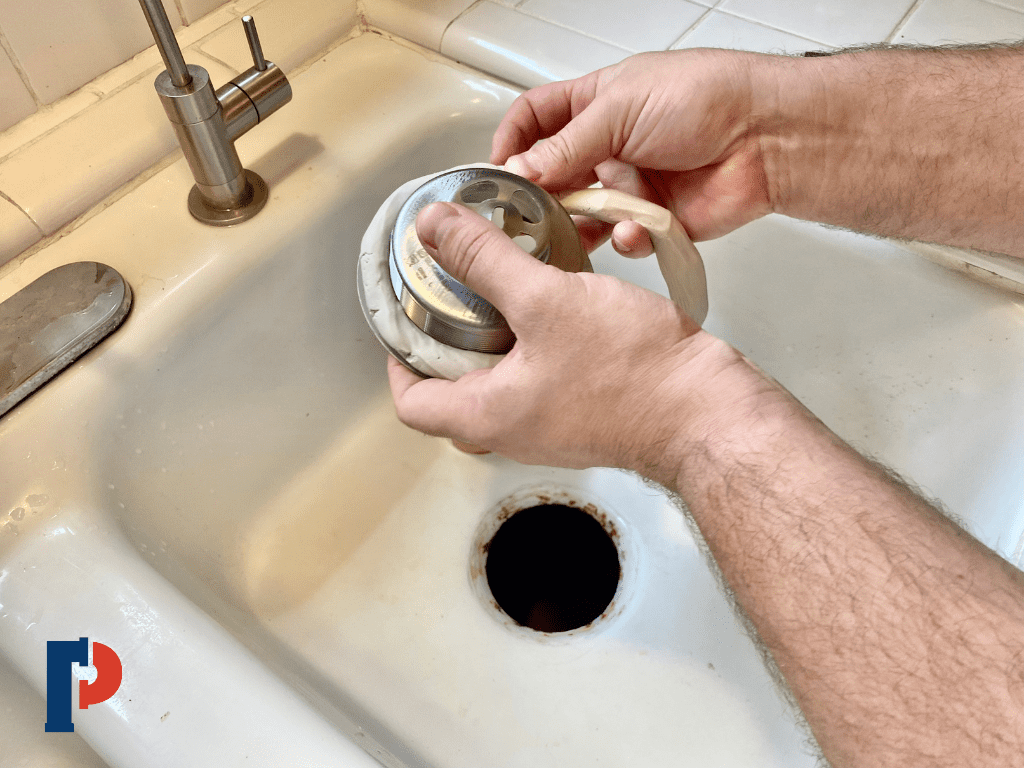
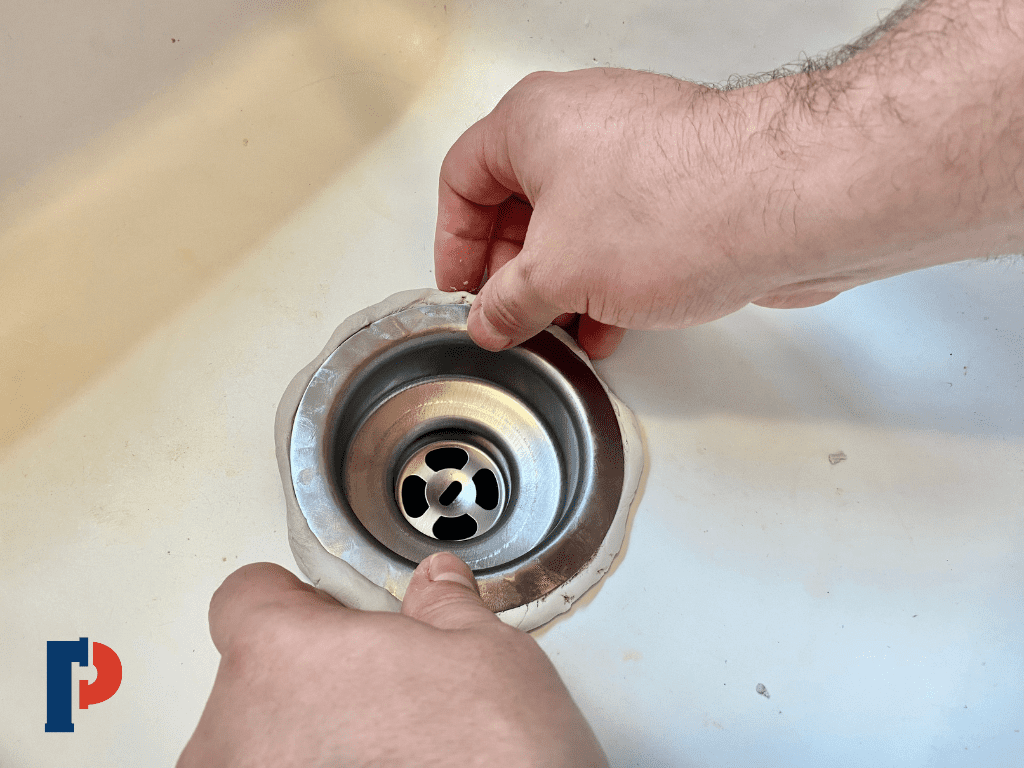
4. Place the Putty Rope
Gently press the putty into a ring that is similar in size to the drain or faucet fixture’s bottom that you want to seal.
Make a ring with the rope and connect the ends together.
To ensure a tight fit and reduce the chances of a leak, fit the drain or fixture into its proper location.
5. Press into Place
Press the putty firmly into place against the fixture or pipe. Ensure that there are no air bubbles in it and that it’s tightly packed around the fitting.
You want to make sure the putty is pressed down evenly all over, especially around any cracks or crevices in your fixture. Putty will fill in these areas and ensure a watertight seal.
6. Replace the Part
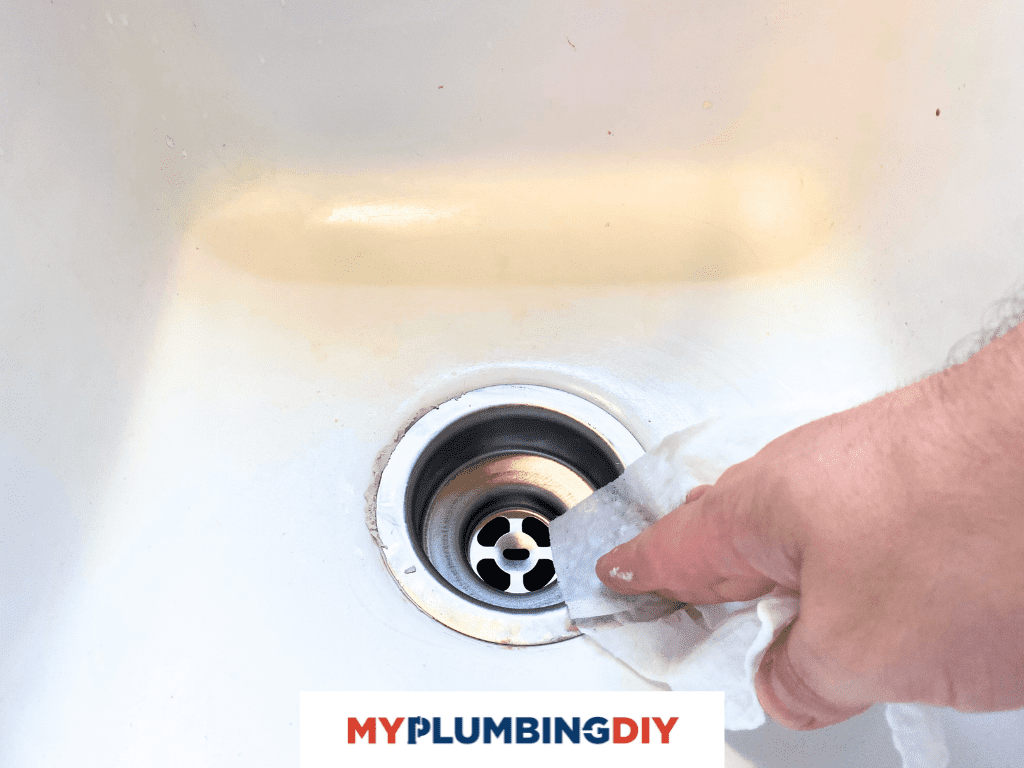
Now you can install the part or do the assembly as needed. When the fixture is fully screwed in and tightened, the excess putty will be squeezed out of it.
You can remove any excess putty with your fingertips to make it look nice and smooth.
7. Put Excess Putty Back in the Tub
If you have putty leftover even after completing your project, make sure to place the excess back in the tub. However, make sure that the excess putty is clean and free of debris before putting it back.
If you properly seal the tub, the plumber’s putty will be pliable for roughly two years.
8. Test for Leaks
The good thing about using plumber’s putty is that you can use the sink, faucet, or shower as soon as the part has been installed. You don’t need to wait for it to dry.
After applying putty, run the water to look for any possible leaks. If you find one, use more putty to replace it.
Where to Use Plumber’s Putty?
Use it to seal pipes and fixtures in your plumbing system, such as:
- Bath tubs and shower drains
- Sinks and washbasins
- Toilets
- Faucets or taps that leak from the base or spout area
It should not be used in any pressurized connection, such as a gasket fitting or on the thread of pipes. Plumber’s putty is not an adhesive or glue.
Frequently Asked Questions
After plumber’s putty has been applied, you can start using the sink drain or faucet right away. Because plumber’s putty does not dry, there is no waiting time. It simply seals the gaps and the sink, drain, or faucet, making them ready to use as soon as they are completed.
Make sure to read our article about how long does plumber’s putty take to dry for more information.
Yes, plumber’s putty can be used to stop leaks. It is not an adhesive or glue but it will seal the gap and create a watertight seal around pipes and fixtures.
Because the putty has little elasticity, make sure that there are no gaps in the putty before you try to close a leak with it.
Yes. Using plumber’s putty when installing a sink is the best way to ensure that your sink drains properly and no water leaks out.
Plumber’s putty remains soft and malleable for a long time making it simple to remove the drain and make repairs, if required.
Final Verdict
Using plumber’s putty is a simple way to ensure that your fixtures and pipes are protected from leaks. It forms an adequate seal, making sure there’s no leakings in the drainage system.
It also makes repairing and changing parts more convenient because they can be removed and reused after the job is completed.
The 7 easy steps above will perfectly guide you in how to use plumber’s putty. If you have any questions, don’t hesitate to leave them in the comment section below.